Ok, time to get to work.
I had originally planned to move the spare tire up to the front to offset the weight, but there isn't a mount on this car, so I just took it out altogether.
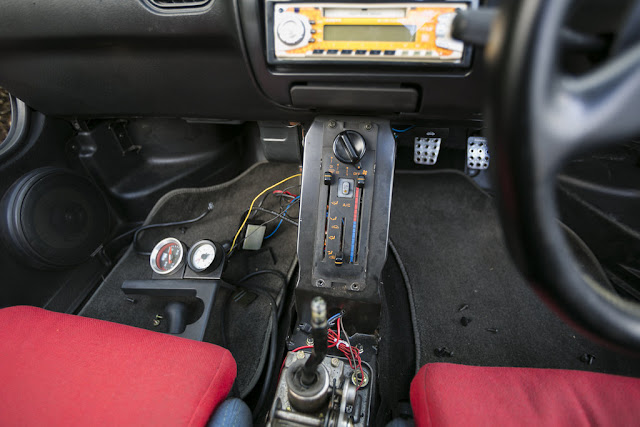
The biggest issue with the AZ1 for me (and even a complaint in Japan) is that the interior is very cramped. My left leg is trapped between the steering wheel and the center console where the heater controls are.
It's a tight fit! I wondered if maybe using smaller padding on the driver's seat might get my some more room.
The padding is about 2" thick, so if I can swap in something that's only 1" thick, we're in business. A quick glance at the underside of the padding showed that the previous owner had a similar idea:
He shaved about an inch off of where the thighs go, but not where you sit. I may shave some more out of this before I have to order some racing pads. It's pretty comfy already, so I don't mind suffering a bit. It's not a road trip car, after all. One thing I did want to do was buy a smaller steering wheel, so I ordered a suede 300mm Sparco:
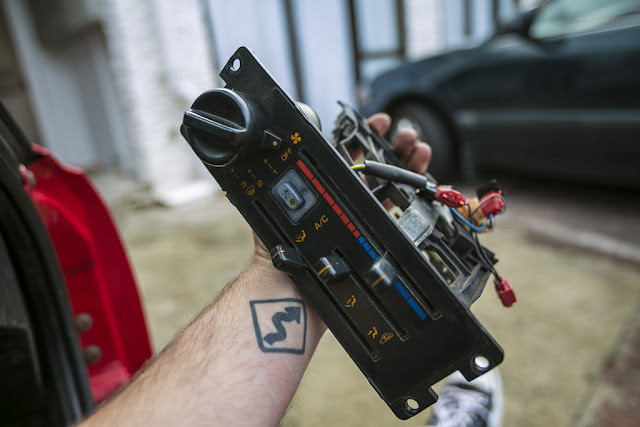
After having seen Drive's youtube clip of the Autozam in New York, I decided to do the same thing he did and relocate the HVAC up to where the radio is. I can move the radio somewhere else, possibly mount it hidden inside the dash somewhere. First thing's first:
Wow what a mess of crazy wires back there! Next to come off is the shift knob:
Then the rest of these crazy panels.
Then off come the gauges.
I wanted to relocate the voltage and boost gauges anyway, because they're totally blocked by my left knee, and I'd still like to use them. As you can see in this photo, they're really far down there:
Getting the head unit out was more difficult than it should have been because one of the clips on the mounting box was bent. First you have to take the top cover off. Super easy because there are only 3 screws:
The previous owner spliced in all kinds of crazy stuff everywhere. I'll try and clean it up as best I can before putting it back together.
The really complicated part though, was removing the HVAC.
It took a long time and a lot of troubleshooting. Basically, the sliders are connected to cables, and all 3 of them need to be disconnected (in addition to unplugging and unbolting) to get the HVAC out. It will only come out toward you, unfortunately.
And then you have to reassemble everything before working it back up under the dash and into position where the radio was. I initially thought I could just shove it in and mount it like this:
.... but then there was no way of attaching the cables. There just isn't enough room back there to work. Not to mention, mounting it this way wouldn't leave enough room for the cover piece to fit back on properly.
I'll try and get a shot of how contorted I was. Even with the driver's seat out, it probably looked hilarious when I tried to get my head under the dash. Also, something I didn't know: the driver's seat has sliding rails, and the passenger's seat does not. The mounting points on each are completely different.
Of course the radio surround was smaller than the HVAC, so I took a knife to the inner piece. Then I wrapped it in suede, just to keep it a bit cleaner.
I ran out of time once again, so I'll hopefully finish mounting the HVAC up next weekend. Then I'll need to figure out a better spot to put the gauges. There is so much more space under the dash already, and I can see exactly why the guy from New York did what he did.


No comments:
Post a Comment